
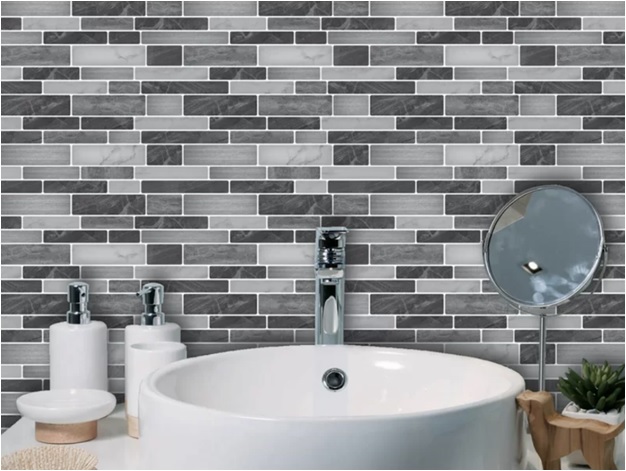
Are you tired of having to grout your shower? Stick on shower tiles are an easy way to give your bathroom an instant face-lift while also saving time and money! The tiles come in dozens of different patterns and styles, so it’s easy to find one that matches the rest of your bathroom decor. They’re also waterproof and very easy to clean! Read more about how to tile your shower with stick-on tiles here…
What You’ll Need
- Peel and stick tiles
- Adhesive spray or glue
- Waterproof sealer
- Scissors or utility knife
- Utility blade
- Ruler
- Paint brush
- Grout
Preparing the Surface
Before you can apply the tiles, it’s important that your surface is clean and dry. You can use a degreasing agent or a mixture of bleach and water for this. Once the surface is ready, peel off one square at a time from the sheet and place it on the wall or other surface. Start from the top and work your way down, overlapping each tile as you go.
Make sure there are no gaps in between tiles. For example, if you’re tiling around a shower stall, ensure that the gap under the stall is filled up with adhesive before placing another tile. To create a design, lay out some stencils on the floor or table and then trace them onto your project surface using pencil or chalk.
If you don’t have stencils, simple tape can be used to create patterns (just make sure it’s not too sticky!). If any adhesive seeps through onto surfaces below (such as flooring), remove excess material immediately by scraping gently with credit card edge or squeegee until just a thin film remains.
Measuring and Cutting the Tiles
Measure your surface and calculate how many tiles you’ll need. Remember that the product is sold by square foot and it’s important to buy enough tiles. Peel the backing off the tile, place it on your surface, then use a level to make sure it is even on all sides.
It’s important to measure the width of your tapered shower head before tiling so that you don’t end up with too much space on one side. You may also want to put down some plastic or cardboard under the tapered area if there is any chance of water getting onto your flooring or walls.
Once all the tiles are down, add spacers (optional) for an even appearance. If needed, cut around corners with a utility knife and remove excess adhesive from around seams with scissors or a credit card so they will stick better when wet. Now let’s talk about caulking!
Applying the Tiles
Peel and stick tiles are self-adhesive, so you’ll want to start in the center of your surface and then work out towards the edges. Don’t forget to peel off the backing before you stick it on. If you’re tiling a shower stall or bathtub surround, make sure that your surface is fully dry before applying these tiles.
To install them on vertical surfaces, such as around a tub or shower enclosure, use a straight edge like a level to make sure they are even spaced and aligned. You can also use masking tape along the top edge of each tile for extra grip while installing.
Finishing Touches
Peel and stick tiles are a great option for people who don’t want to mess with glue, grout, or mortar. They are also a good choice if you want an easy way to change your tile design without having to rip out all the old tiles first.
Peel and stick tiles work best in showers because they can be installed over uneven surfaces and on curved surfaces like the corner of a shower or bathtub.
These tiles are peel and stick so no adhesive is needed. You just peel them off the backing paper, line them up where you want them and use your finger or a brayer (a rolling pin) to press them into place along the edges.


Comments